Material
The KKBP material setup
Below is an overview of the KKBP material template. All textures in the .pmx export folder are loaded to the green textures node group below. The texture positions are set using the sliders in the purple group below. The textures are used in the Shader group in the middle to create light and dark versions of the material. The material knows when to show the light or dark version of the texture from the bsdf shader in the Raw toon shading group. A rim is added to the output if it is enabled. If the material has been finalized using the “Finalize Materials” button in the KKBP panel, the baked material png will be loaded at the end too.

After you import the model, the KKBP materials will have what I call the “heavyweight shader”. With the heavyweight shader, you can click on any material, find the “Baked image switch” shown above and set it to zero. Once it is set to zero, you can open the shader group by clicking on the square in the corner

Opening the Shader node group will reveal two node groups, a light color group on the left and a dark color group on the right. These colors are automatically set using the RGB information stored in the KK_MaterialData.json data (this file is located in the .pmx export folder). You can freely edit any of these colors or sliders for all Hair materials, Clothes materials, Body materials, etc.

When you click the “Finalize Materials” button on the KKBP panel, all materials will be replaced with their lightweight shader version. This version of the material is a lot more performant and will load very quickly compared to the original material.

Updating a finalized material
If you want to go back to the heavyweight material to edit it again, you can set the material back to the -ORG version of the material.

Recall that you must also set the “Baked image switch” to zero on the heavyweight shader before you can edit it

Here I have updated the hair color on the heavyweight shader

To finalize the material again, just click the “Finalize Materials” button on the KKBP panel. The material will be re-finalized and the lightweight shader + atlas model will be updated.

Plain Maintex vs Colored Maintex
Plain Maintex files are a component that make up the Maintex you see in game. The Plain Maintex is combined with the colors you set in game and the colormask texture. All three combined create the full Colored Maintex.

Colored Maintex files from the KKBP Exporter already have the colors applied and also include any additional overlays, so it combines the Plain Maintex + Colormask files + colors + overlay files together. If you want to change the colors on the fly, you can swap to the plain maintex by setting the “Use colored maintex” and “Ignore colormask” sliders below to 0 instead of 1.

Special materials (Outlines)
Outlines have a different material setup. If an alphamask is available for this material, the alphamask’s red channel will be used to determine where the outline should be transparent. If it is not available, the maintex alpha channel will be used for determining transparency instead. If neither are available, the outline will be visible everywhere on the material. The outline materials will not be converted to png files when you click the Finalize Materials button.

Special materials (Eyes)
The eye texture is automatically created by the KKBP Exporter. If you want to use the custom eye slider and change the colors of the eye on the fly, you have to extract certain eye textures from the game using SB3Utility, then load them into the green texture group and recreate the eye from scratch. Here’s an example of doing that
Eyes have a special material setup that allows you to change both of them at once. If you want to change the eyes separately, you can make the eye shader node group unique by clicking on the number next to the node group name:

Special materials (Body)
The body has a transparency mask to prevent it from clipping through some clothes Check here for making the body visible.
If you are finding that the body is still transparent in the wrong areas, you can either edit the body alpha mask (location shown below), or load a different body_AM file from your pmx export folder. The first body alpha mask for the first outfit is automatically loaded in (cf_m_body_AM.png), so if you switch to a different outfit you’ll have to switch the body mask to the right one (ex. body_AM_01 for outfit 01, 02 for outfit 02, etc).

Special materials (Hair)
Hair has a special material setup that allows you to change the like-colored hair materials at the same time. These are usually labeled as “Hair shader”. The KKBP importer will attempt to find like-colored hair and automatically group them together with the Hair shader node group. If a hair material is a different color, or it has a main texture the node group will be made unique. Check the screenshot in the “Special materials (Eyes)” section above for how to give specific pieces of hair different colors.

Special materials (Tears)
Tears have a special material that uses a gradient to get a look similar to the in-game one. You can make the tears use an HDRI or a flat color instead by using the sliders in the Tears material.

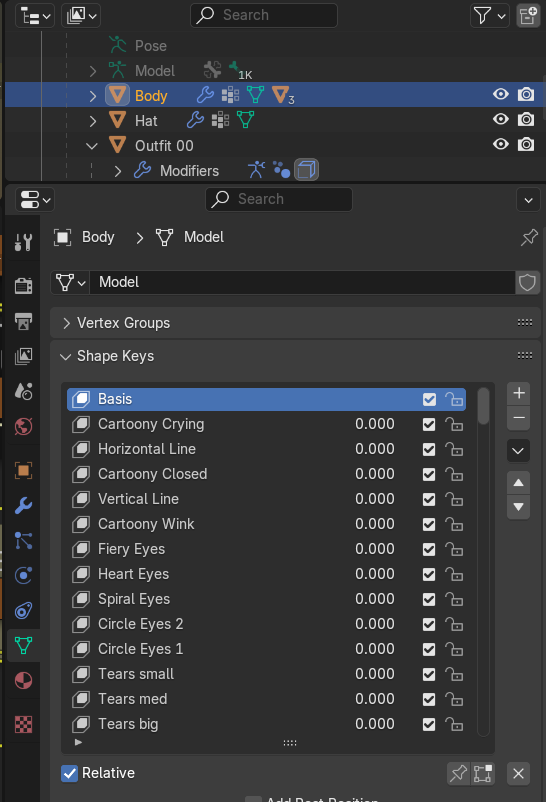
Tears can be activated in the shapekey panel
Special materials (Gag eyes)
There are three sets of Gag eyes: Gag00, Gag01 and Gag02
Gag00 images are displayed in a mirrored fashion (both eyes mirror each other)
Gag01 images are displayed as is
Gag02 images are animated by continuosly changing the location of the UV map over time (also used by the Cartoony Wink expression)
Gag eyes use drivers to determine what expression to display. When you activate a gag shapekey on the Body object, certain eye materials are moved back into the head to hide them, the gag eye mesh comes out to the front of the head and an image is displayed depending on which gag shapekey was activated.
The default import comes with settings that make the face area behind the gag eyes look bad. Disabling the face eyeshadow intensity, setting the face rim to “None”, and using the features in the “Permanent light / dark settings” or “Smoothing out the look of the face” sections below can help with that.

Gag eyes can be activated in the shapekey panel
Smoothing out the look of the face
Some face shapekeys can look pretty bad around the mouth in certain lighting conditions

This can be avoided by changing the “Raw Shading” group in the face material to the “Raw Shading (smooth normals)” group instead. If you want smoothed normals for the body, make sure you use “Raw Shading (smooth body normals)” instead.

Then turn up the iterations and enable the geometry nodes modifier in the viewport / render view:

The model should have smoothed normals now

These smoothing node groups were taken from this page
Koikatsu color conversion
The colors you see in Koikatsu are not the real colors being used; they’re actually being saturated. In order to replicate the colors shown in koikatsu, all colors and images are run through the color_to_KK and image_to_KK functions in converttextures.py to convert the base colors to the “real” colors seen visually in the game. This process is also run on all Maintex images.
Here’s an example of a material before and after color saturation

Koikatsu dark color conversion
The game uses a second color conversion process to automatically get dark colors for every light color. The skin_dark_color and clothes_dark_color functions in modifymaterial.py are used to replicate this process in Blender and to automatically obtain dark colors for every piece of clothing and create dark Maintex images. If this is disabled in the panel, you’ll only get the light colors.
Cycles support
Basic Cycles support is available by selecting “Use Cycles” in the panel. This will replace the Rim node group in the KK shaders with a Toon-like shader compatible with Cycles. The outline is disabled in the mode.


Normal blending methods
A different normal blending method is available in the Raw Shading group. Enter it and find the node to use the Unity tech demo blending method. These blending methods were taken from this page and also this page

Normal quality settings
Normals are set to lower quality by default to increase animation playback performance. To change to higher quality normals, just enter the Raw Shading group, connect the higher quality output node and unmute the node by selecting it and pressing the M key. This is done automatically when baking materials so you don’t need to worry about it if you plan on exporting the model from blender.

Toon shading settings
Toon shading is created by the color ramps in the Raw Shading group. You can edit the color ramps in this section to increase or decrease the amount of light needed to show the light or dark version of the materials.

Permanent light / dark settings
Parts of each material can be made permanently light or dark using the Permalight image in the texture node group. The red channel of the image is used for permalight and the blue channel is used for permadark

Per-character light linking settings
If you have multiple characters in a scene, this allows you to “link” a light to a character, so you can achieve ideal lighting for each character and not have to fiddle with a global lighting setup that affects all characters at once. This works for up to three characters / light sources. It’s enabled by default and can be found inside of the Raw Shading group.
Usage: Enter the Raw Shading group then make sure the “Light linking options (open me)” group framed in pink has it’s slider set to 1, and any red lights will light your character. Import a second character, return to the ““Light linking options (open me)” group, and open it. Change the output of the pink “Match RGB output and sunlight color for light linking” frame from R to G. Any green lights will light the second character, but not the first character. Using a yellow light will light both R and G characters. Using a white light will light all characters.

Light color influence
When you use a light that isn’t pure white, the colors on the model will become affected by the color of the light. This is disabled by default and can be found inside of the Raw Shading group. Colored lights and light linking can’t be used at the same time.
Usage: Make sure the “Light linking options (open me)” group framed in pink has it’s slider set to 0, and any colored lights will add additional color to your character. Any white lights will light the model like normal.

Shader to RGB support
Many color inputs on the KK shader have a “Shader to RGB” node on the inside, so they can accept shaders like the principled BSDF as an input.

Editing the KKBP shader
The KKBP library file can be edited if you want to use a custom material or node setup for all imported models. Keep in mind the import scripts will error out if certain things are missing, so don’t delete anything already in the file. The library file is usually located here: C:\Users\[your username]\AppData\Roaming\Blender Foundation\Blender\[your blender version]\scripts\addons\KK-Blender-Porter-Pack\KK Shader.blend